There is always a risk of the presence of bacteria in sprouted goods. The Food Standards Agency advice is that people who are more at risk from food borne illness should avoid raw sprouts. This includes children, pregnant women, the elderly and anyone with health issues that weaken the immune system. People in these groups are advised to cook all sprouts thoroughly until they are steaming hot throughout before eating them.
Why grow my own sprouts?
Sprouts are tasty, fresh and satisfying to grow at home – with sprouts you can have your own windowsill farm! With their beautiful colours and glistening freshness, sprouts can be a home-grown luxury that’s actually really inexpensive. Lentils in particular are a cheap option – just a spoonful of lentils when sprouted can produce handfuls of sprouts.
What can I sprout at home?
You should only use seeds, lentils or beans intended for sprouting use. Seeds sold specifically for sprouting are subject to higher safety standards than, for example, packets of seeds or lentils from the supermarket. Seeds sold for gardening or for bird food are unsuitable for sprouting as they may have been coated or treated with fungicide.
Certain seeds are unsuitable for sprouting due to the toxins they naturally contain. Kidney beans contain a toxic substance (phytohaemagglutinin) which is only destroyed by prolonged boiling. This makes them unsuitable for sprouting. Tomato, pear, apple and citrus fruit seeds are toxic due to the small amounts of amygdalin they contain. Your stomach turns this into hydrogen cyanide when chewed and digested. Don’t worry if you accidentally swallow some when eating an apple though as the quantity per seed is quite small and intact seeds will probably pass through the system undigested.
What equipment do I need?
Sprouting jars with a mesh lid are a good option. Buying a two or three tier sprouter is ideal. These work well and you can have a range of different sprouts on the go at one time. The tiered sprouter has slats to allow thorough rinsing and drainage with running water passing through the seed trays into a collector at the bottom.
If you don’t have one of these, you can make your own sprouter – the easiest reliable method is to take a large glass jar and cover the top of the jar with a piece of muslin secured with an elastic band. You then run water into the jar through the muslin and drain in back out again. To remove all the access water, put your jar upside down in a bowl on a 45° angle to drain.
What is most commonly used for sprouting?
The following are commonly used for sprouting but you will also find others.
| Seeds | Grains | Beans/Lentils | |
| Alfalfa seeds | Barley | Aduki beans | |
| Broccoli seeds | Buckwheat | Broad beans | |
| Chia seeds | Corn | Chickpeas | |
| Clover seeds | Kamut | Lentils | |
| Fenugreek seed | Millet | Green peas | |
| Flax (linseed) | Oats | Mung beans | |
| Leek seeds | Quinoa | Pinto | |
| Mustard seeds | Rye | Soya beans | |
| Radish seeds | Spelt | ||
| Sesame seeds | Wheat | ||
| Sunflower seeds | |||
How to sprout at home
If growing sprouts at home, it’s important to follow good hygiene practices. The sprouting process can be broken down into six stages:
Step 1. Find a suitable place in your home
A light and airy spot is best, but not in direct sunlight. Sprouting works best somewhere cool and with consistent light levels, such as a north facing window sill or worktop out of the sun. A place with good air circulation is key, choose somewhere with good air flow and don’t be tempted to put your sprouting container in a cupboard.
Step 2. Get your equipment ready
It is important that any equipment you use to grow sprouts is thoroughly cleaned from the beginning in hot soapy water. Always remember to wash your hands before handling the equipment, seeds or sprouts too.
Step 3. Soaking
The seeds need to be soaked in water for up to 12 hours first to re-hydrate the seeds and encourage the start of the germination process. First, place the seeds in a bowl or jar. Then, fill with water: use around 2-3 times the amount of water to seeds. Keep them in a dark place at room temperature for 8-12 hours.
Step 4. Rinsing
Once you’ve soaked your seeds and started the germination process, the next stage is to rinse and drain them until they start sprouting. Use cool water to rinse and do this 2-3 times a day. It is important that you rinse your sprouts frequently to help avoid bacteria build-up. You can find more information above, depending on the type of equipment you are using. Growing sprouts should be kept at around 20°C as the temperature needs to be high enough to encourage germination, but not too high to cause bacteria or mould to grow.
Step 5. Maintaining airflow
After rinsing your seeds, you need to keep them moist to encourage growth, but also to not have them too wet. Keep the seeds relatively spread out to provide good airflow. If you are using a glass jar, try to use one that is long and fairly wide and avoid a small jar where all the seeds are cramped together. When draining, be sure to shake or tap your container to remove as much excess water as possible.
Step 6. Harvesting and storing
Home-grown sprouts such as aduki beans and lentils will be ready to eat in around three days, when a small shoot is just visible. Sprouts such as alfalfa or radish are generally harvested when about 3cm long and will be ready to eat in around six days.
To harvest, give the sprouts a final rinse and drain thoroughly. Sprouts should not be stored wet. One of the most effective way to remove excess moisture is to put the sprouts in a muslin or tea towel. Then, put them in a salad spinner, or pat them dry with kitchen towel, before transferring them to the fridge in a container.
Home-grown sprouts that are ready to eat will last up to five days if kept under the right conditions. Shop-bought sprouts will already have spent time in transit and storage, so will only keep in the fridge for about two days.
The Food Standards Agency recommends that your fridge is kept between 3°C and 5°C to minimise food spoilage. If your sprouts start to discolour and look brown, they have started to go off and should be discarded. If your sprouts develop a sour smell or a sweaty appearance, do not use them. Always thoroughly sterilise your sprouting equipment before starting a new batch.
Using and cooking with sprouts
Sprouted seeds and pulses are really versatile things to have in the kitchen. They can be used just as you would most kinds of beans or lentils.
You will find their firm, crunchy texture is particularly good for burgers and stir-fries as well as making salads a whole lot more interesting, especially when combined with cooked or sprouted grains. You can also add sprouts when making dips – try using some sprouted chickpeas or sprouted sesame seeds in your homemade hummus.
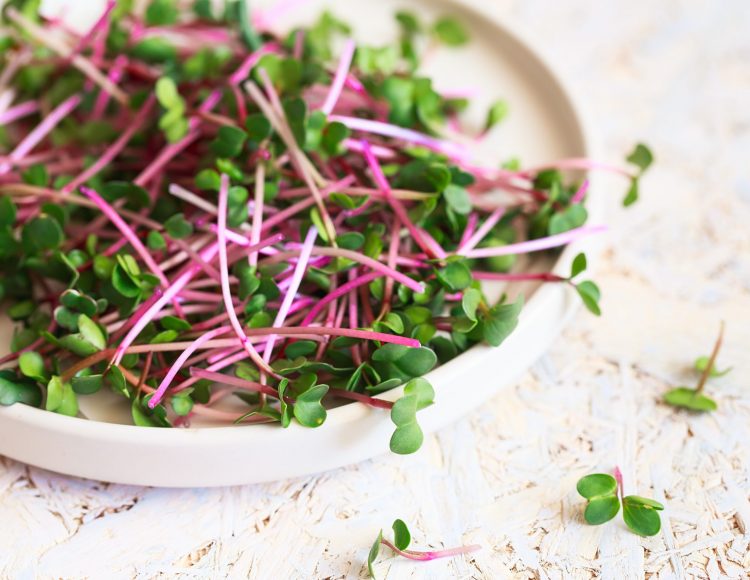
The fresh texture and visual appeal of sprouts is part of their secret but some seeds also pack a flavour punch too. Herb seed sprouts such as fenugreek and dill are delicate and delicious, and sprouts of radish and broccoli are peppery and hot. Enjoy them as a topping for dips, salads, broths or sprinkle some on a bowl of noodles.
You can also use sprouts in baking. Sprouted grains and seeds that have a nutty flavour, such as pumpkin, sesame and sunflower work particularly well. Seed and grain sprouts can be coarsely ground and used in cookies and seed bars and sprouted wheat and date bread is a delicious not-too-sweet treat to try.
Whatever your level of experience or cooking skill might be, sprouting is a fun and simple thing to do at home. Fresh sprouts are a nutritious addition to almost any kind of dish, as well as being an inexpensive luxury item, sprouting can provide an almost endless adventure of new things to try. If you give sprouting a go, why not get in touch with us and share the results?
Recipes
-

Packed Lunch, Snack
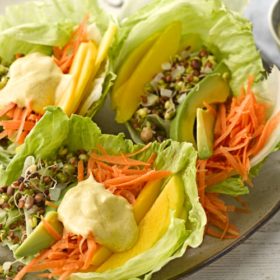
Lentil and Avocado Lettuce Wrap
See recipe
Sprouting in more detail…
What are sprouts?
Sprouts are germinated seeds, grains, lentils or pulses which are used before or just after the first leaves appear. They are very nutritious. The most common sprouts in the shops are beansprouts, which are usually grown from soya or mung beans. Some stores may have a variety of other pre-packed types the most common being alfalfa, which looks a bit like cress, mixed lentils and beans are also sold which are usually multi-coloured and juicy looking.
Are microgreens the same as sprouts?
Like sprouts, microgreens are germinated, but are generally grown on for longer in a tray and allowed to develop their leaves. Unlike sprouts, which are typically grown just with water, microgreens are grown in a shallow layer of compost or on a growing mat made from coconut coir or hemp. Microgreens are more substantial and include things like wheatgrass, herb shoots, and broccoli or cabbage seedlings.
Are shop-bought sprouts safe to eat?
Unless shop-bought beansprouts are labelled “ready-to-eat” you should always cook them first, as eaten raw they carry a higher than average risk of food borne illness. Ready-to-eat sprouts will have been grown in a way that makes them safe to eat raw. Shop-bought sprouts will usually have spent time in transit and storage, so will only keep in the fridge for about two days.
Are sprouts good for you?
Seeds, grains and especially lentils and other pulses are an important source of protein for vegetarians but the on top of the protein content sprouts have an enhanced vitamin content and are better sources of key minerals such as iron and zinc. The vitamin A, C and E content of sprouts is considerable but sprouts really come into their own as a source of bioavailable minerals.
Inside a seed (a grain of wheat, a bean or lentil) a substance called phytic acid stores minerals for the dormant plant. This phytic acid binds tight to minerals such as iron and zinc. But when you set seeds to sprout and the seed germinates, the phytic acid changes form and the minerals are released. This makes sprouts a better source of absorbable iron and zinc than the unsprouted lentil or dried grain.


